Have you ever been in the kitchen, staring at a cake pan and wondering how to achieve that flawless slice every time? Crafting the perfect slice of cake isn't just about visual appeal; it’s about ensuring that it comes out easily and remains intact, whether you're slicing it for a birthday celebration or a casual family dessert. This guide will walk you through every step to master the art of cake slicing, offering practical advice and actionable tips to ensure you can impress your guests with every cut.
Introduction: The Journey to Cake Slicing Perfection
Perfectly slicing a cake can sometimes feel like a daunting task. Whether you’re dealing with dense layers or delicate sponges, achieving a smooth, professional look requires some finesse and a few insider tricks. This guide is designed to take you from novice to pro, providing real-world examples and practical solutions that make cake slicing straightforward and enjoyable.
From understanding cake types to selecting the right tools, and finally mastering the slicing techniques, this comprehensive guide ensures you have everything you need to achieve a perfect slice for any occasion. So, let’s dive in and transform your cake-slicing skills!
Quick Reference Guide: Cake Slicing Essentials
Quick Reference
- Immediate action item with clear benefit: Use a sharp, flexible serrated knife and dip it in hot water to prevent the cake from sticking and to achieve clean cuts.
- Essential tip with step-by-step guidance: To ensure even slices, periodically wet the knife with hot water, and let it dry between cuts.
- Common mistake to avoid with solution: Failing to chill the knife before slicing can cause the cake to break or crumble. Always chill the knife in the fridge for at least 30 minutes before use.
Step-by-Step Guide to Slicing a Cake Perfectly
Achieving perfect cake slices involves more than just skill; it also includes understanding the right techniques and using the proper tools. Follow these steps to ensure a professional-looking slice every time.
Step 1: Preparing Your Cake
Before you even pick up a knife, it’s important to make sure your cake is ready. Allow the cake to cool completely and then refrigerate it for at least an hour. This helps the cake set, making it easier to slice.
Step 2: Selecting the Right Knife
The type of knife you use is crucial for achieving clean slices. A serrated knife is ideal for most cakes as it slices through the cake without crushing it. Invest in a good quality knife, and make sure it’s sharp and flexible.
Step 3: Chilling the Knife
Refrigerate the knife for at least 30 minutes before slicing. A cold knife is firmer and less likely to break or crumble the cake. If you don't have time to chill the knife, running it under cold water for a few seconds before slicing can work as a quick substitute.
Step 4: Preparing for Slicing
Once your cake is chilled and your knife is ready, place the cake on a flat surface. You can use a cake board or a sturdy cutting board. If you want to add a decorative touch, you can wrap the bottom of the cake with a slice of fruit or a sprig of mint.
Step 5: Making the First Cut
Starting from the center, gently insert the serrated knife into the cake. Make a small incision first, then carefully push the knife down, keeping it straight and level. Use gentle pressure to avoid crushing the cake.
Step 6: Achieving Even Slices
To ensure even slices, use the hot water technique. After cutting the first slice, dip the knife in hot water, let it dry briefly, and then cut the next slice. This keeps the knife clean and makes each cut smooth.
Step 7: Using the Cake Stand
After making the first slice, you can use a cake stand or a rotating cake board to achieve even slices. By rotating the cake, you can slice through it multiple times without having to reposition the entire cake.
By following these steps, you’ll be able to slice your cake with ease and precision, ensuring a beautiful and even presentation.
Detailed Techniques for Different Cake Types
Different types of cakes require slightly different techniques to achieve the perfect slice. Here’s how to handle various types:
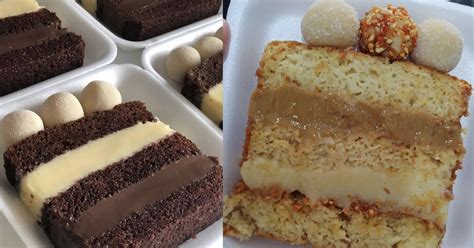
Dense Cakes (e.g., fruit cakes, chocolate cakes)
Dense cakes can be tricky to slice due to their firm texture. To ensure a clean cut:
Step 1: Refrigerate for at least 2 hours.
Step 2: Use a wire cake slice for added leverage and to minimize the pressure needed.
Step 3: Dip the wire slice in hot water, let it dry, and repeat between cuts.
Sponge Cakes (e.g., angel food cakes, chiffon cakes)
Sponge cakes are light and airy but can easily crumble. To achieve perfect slices:
Step 1: Refrigerate for at least 1 hour.
Step 2: Use a thin, sharp knife for a gentle cut.
Step 3: Support the cake with a cake board or another flat surface to prevent it from breaking.
Layer Cakes
Layer cakes require precision to maintain the structure of each layer:
Step 1: Use a serrated knife or a wire cake slice.
Step 2: To easily separate the layers, run a thin knife between the cake and the pan’s bottom just before slicing. This helps prevent sticking.
Step 3: Chill the knife as described earlier to ensure clean cuts.
Decorative Cakes
Decorative cakes often have intricate designs and require careful handling:
Step 1: Let the cake cool and set in the refrigerator for at least 2 hours.
Step 2: Use a knife with a long, flexible blade to maintain control and avoid disturbing the decorations.
Step 3: When making a cut through a decorated section, start from the bottom layer and work your way up to avoid shifting decorations.
Practical FAQ: Answers to Common Questions About Cake Slicing
Why does my cake fall apart when I try to slice it?
Cakes fall apart due to lack of proper setting time, using a dull knife, or not chilling the knife. To prevent this, ensure the cake is chilled thoroughly, use a sharp serrated knife, and always chill the knife before slicing.
Can I use a serrated knife for all types of cakes?
While a serrated knife is ideal for most cakes due to its ability to cut without crushing the cake, for delicate cakes like sponge cakes, a thin, sharp knife might be more appropriate to minimize breakage.
How can I make my cake slices look more professional?
To achieve professional-looking slices, use a cake stand or rotating cake board for even cuts, chill the knife properly, and periodically wet and dry the knife between cuts. Smooth transitions and clean cuts are key.
What should I do if my cake is too sticky to slice?
If your cake is too sticky, ensure it has been chilled for at least an hour. Use a wire cake slice for denser cakes, and for sponges, use a thin