Unlocking the Beauty of Custom Nintendo Switch Skins
Are you tired of the same old look on your Nintendo Switch? Do you want to personalize your console with something unique and eye-catching? This guide is crafted just for you. It’s time to dive into the world of Nintendo Switch skins, where you can express your individual style and bring some new life to your gaming experience. We’ll walk you through practical advice and showcase the top 5 designs to inspire your creativity. Let’s embark on this journey to discover how to enhance your Switch with stunning custom skins.
The Problem-Solution Opening: Overcoming the Fear of Personalizing Your Nintendo Switch
Changing the appearance of your Nintendo Switch can be daunting, especially if you’re unsure about whether you can do it without causing damage or whether it’ll look as good as you envision. This guide addresses these common concerns with step-by-step guidance, practical solutions, and real-world examples. Whether you’re a first-time skinner or a seasoned pro looking to diversify your designs, this guide provides the necessary tools to transform your Switch without hassle, ensuring a beautiful, personal touch that stands out.
Quick Reference
Quick Reference
- Immediate action item: Purchase high-quality adhesive skins and tools.
- Essential tip: Start with a clean, dry surface and follow the installation instructions carefully.
- Common mistake to avoid: Using low-quality materials or rushing the installation process.
Step-by-Step Guide to Applying Nintendo Switch Skins
Applying a custom skin to your Nintendo Switch can be a rewarding project. Follow this detailed process to ensure a smooth and flawless finish.
Step 1: Gather your materials. You’ll need a high-quality skin, a squeegee, a microfiber cloth, adhesive remover, and any other tools recommended by the skin manufacturer.
Step 2: Prepare your workspace. Ensure that your working area is clean, well-lit, and free from static electricity which can interfere with the skin’s application.
Step 3: Clean your Switch. Use the adhesive remover to clean the surface of the Switch, paying special attention to any dust or oils. Allow it to dry completely.
Step 4: Cut the skin. Use a pair of scissors to carefully cut the skin to the exact size needed to cover your Switch.
Step 5: Peel off the backing. Slowly peel off the backing of the skin to reveal the adhesive side.
Step 6: Align and apply the skin. Start from one corner and carefully align the skin. Use the squeegee to remove bubbles and smooth out the skin as you go, pressing firmly but gently to adhere it to the Switch.
Step 7: Final touches. Once the skin is applied, use a microfiber cloth to clean any leftover adhesive residue. Check for any bubbles or wrinkles and use the squeegee again to correct any issues.
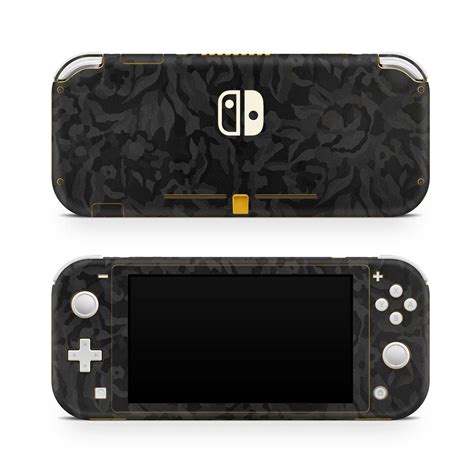
Design Inspiration: Top 5 Unmissable Nintendo Switch Skins
Here are five top designs that have made waves among Switch enthusiasts for their creativity, durability, and aesthetic appeal.
- Astronaut Adventure: A galactic journey with stars, planets, and sleek tech elements that breathe life into your console.
- Art Deco: Classic, elegant, and full of bold patterns, reminiscent of the Jazz Age, this design brings a touch of luxury.
- Pixel Art: Tiny, vibrant, and full of nostalgic charm, this design evokes the early days of gaming with its retro flair.
- Nature’s Palette: Inspired by the natural world, this design features flowers, leaves, and scenic landscapes that bring an outdoor vibe inside your home.
- Futuristic Circuit: A sleek and modern design with a metallic finish, perfect for those who love technology and innovation.
Practical FAQ for Custom Nintendo Switch Skins
How do I choose the best skin for my Nintendo Switch?
Choosing the best skin depends on your personal taste and the type of aesthetic you want to achieve. Consider the themes that appeal to you the most. Look for skins that offer durability, easy installation, and a high-quality finish. Read reviews and check samples if possible to ensure the design and material meet your expectations.
Can I remove the skin without damaging my Nintendo Switch?
Yes, you can remove the skin without damaging your Switch, but it requires a bit of care. Use an adhesive remover and a warm cloth to gently peel off the skin. If the adhesive remains, apply heat cautiously (like using a hairdryer on a low setting) to soften it up before wiping it off. Always proceed carefully to avoid any scratches or marks on your Switch.
Are custom skins waterproof?
Most custom skins are not waterproof. While high-quality skins can be somewhat water-resistant, they are not designed to withstand exposure to water and moisture in the long term. To protect your Switch, avoid getting it wet and clean it gently with a microfiber cloth and a mild soap solution.
How often should I replace my Nintendo Switch skin?
The longevity of your Switch skin depends on its material and the amount of wear and tear it receives. In general, you might want to replace it every 1-2 years, depending on its condition. If it starts to peel, bubble, or lose its adhesive grip, it’s a good sign it’s time for a new one. Always opt for high-quality skins to extend their lifespan.
What’s the best way to clean my Switch with a skin?
To clean your Switch with a skin, use a microfiber cloth and a mild soap solution. Dampen the cloth slightly and gently wipe the surface. Avoid using harsh chemicals or scrubbing too hard, as this can damage the skin. For stubborn grime, use a cloth dampened with rubbing alcohol. Dry the Switch thoroughly before replacing the skin if necessary.
By following this comprehensive guide, you’ll be well-equipped to customize your Nintendo Switch with stunning designs. Remember, the key to a perfect skin application lies in preparation, careful execution, and regular maintenance. Dive in and make your Switch truly yours!