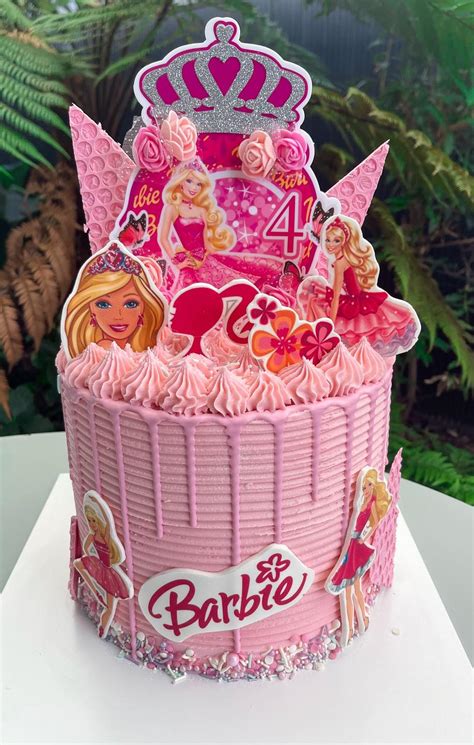
Creating Barbie cakes is a delightful and imaginative way to celebrate special occasions. Whether it’s a birthday, party, or any festive event, a Barbie cake can be an enchanting centerpiece. This guide provides practical steps, actionable advice, and expert tips to create stunning Barbie cakes that will leave a lasting impression. Let’s dive right into it and address your immediate needs for crafting these magical cakes.
If you're looking to bring some fun and fantasy into your celebrations, Barbie cakes might be the perfect choice. Crafting a Barbie cake can be both challenging and rewarding. The key is to break down the process into manageable steps and focus on the essential details that will make your cake shine. This guide will walk you through each stage, offering real-world examples and practical solutions to common issues, ensuring that you achieve the best results with minimal hassle.
Getting Started: The Basics of Barbie Cake Design
Before you start crafting your Barbie cake, it’s important to understand the fundamental elements of design. Here’s a simple overview to get you started:
- Immediate Action Item: Sketch your design. Start with a basic outline on paper. Include Barbie’s signature elements like her dress, hair, and facial features. This will guide you as you build your cake layers.
- Essential Tip: Choose high-quality cake batter and fondant. The quality of your materials directly impacts the final appearance of your cake. Invest in premium ingredients for the best results.
- Common Mistake to Avoid: Overloading with decorations. While it’s tempting to add every accessory Barbie has, simplicity often looks more impressive. Focus on a few standout features.
Step-by-Step Guide to Creating Your First Barbie Cake
Creating your first Barbie cake can seem daunting, but breaking it down into clear, manageable steps will make it easier. Follow this detailed process to ensure you create a cake that looks as fantastic as it sounds:
1. Preparing Your Cake Layers
The foundation of your Barbie cake lies in the cake layers.
- Baking the Cake: Start by preparing a basic vanilla cake recipe. Bake several layers, ensuring each one is even and properly cooled before proceeding.
- Leveling the Layers: Use a knife or a cake leveler to trim the layers to an even height. This ensures a smooth base for decorating.
- Stacking the Layers: Place the layers on top of each other and use a thin layer of buttercream or another stabilizer to hold them together. Ensure each layer is aligned properly.
Once your cake layers are ready, you’re ready to move on to the next step: creating the Barbie figure.
2. Crafting Barbie’s Figure
Creating Barbie’s figure on the cake requires precision and a bit of creativity.
- Making a Doll Base: Use a foam or a sturdy material to create a base for Barbie’s figure. This will support her weight on the cake.
- Building the Torso: Carefully place a round, hollow balloon inside the cake layer to form Barbie’s torso. Cover it with fondant to give it a smooth appearance. Leave a small opening to remove the balloon later.
- Creating the Limbs: Use pipe cleaners or thin strips of fondant to form Barbie’s arms and legs. Attach them securely to the torso.
- Detailing the Face: Use small pieces of colored fondant to create Barbie’s facial features. Add tiny eyes, a mouth, and any details that resemble Barbie’s recognizable face.
Advanced Techniques for a Perfect Barbie Cake
Once you’ve mastered the basics, it’s time to elevate your Barbie cake to the next level with some advanced techniques:
3. Adding Realistic Details
Adding realistic details to your Barbie cake will make it look more enchanting and lifelike.
- Fondant Features: Use small pieces of fondant to add realistic hair, accessories, and other details. Consider using edible glitter or sparkling sugar to mimic Barbie’s famous hair shine.
- Color Techniques: Employ stippling or embossing techniques to create subtle shadows and highlights on Barbie’s face and body, making her appear more three-dimensional.
- Customizing the Dress: Design Barbie’s dress using layered fondant pieces. Cut, shape, and color each piece to match your desired dress design. Layer the pieces carefully to ensure a smooth, professional finish.
4. Finishing Touches
The final touches are crucial in making your Barbie cake look flawless.
- Frosting the Cake: Once the Barbie figure is complete, cover the entire cake with a smooth layer of buttercream or fondant. Use a bench scraper or a knife to achieve an even, polished surface.
- Decoration Details: Add any additional decorations, such as flowers, ribbons, or tiny candies, to complete the look. Ensure they complement and enhance Barbie’s figure and attire.
- Final Adjustments: Step back and assess your cake. Make any final adjustments to ensure everything is aligned and detailed perfectly. Pay attention to the smallest details to achieve the best outcome.
Frequently Asked Questions
What is the best way to attach Barbie’s limbs to the cake?
Attaching Barbie’s limbs to the cake requires careful precision. First, ensure that the torso is fully covered with fondant and completely smooth. Then, use a small dab of strong adhesive gel or frosting to attach the limbs at the correct angle. Press gently and hold for a few seconds to ensure a secure bond. For added support, you can insert small, thin dowels into the cake layers to serve as a backbone for the limbs.
How do I create realistic hair for Barbie?
Creating realistic hair for Barbie involves using edible glitter and fondant. Start by rolling out a small piece of pink or blonde fondant and cutting it into thin strands. Use a fork to create tiny holes in the strands to make them look more natural. Adhere the strands to Barbie’s head using a dab of adhesive gel. To finish, sprinkle edible glitter over the strands to mimic Barbie’s shiny hair. Ensure the glitter is evenly distributed for a polished look.
Can I make a Barbie cake without fondant?
While fondant provides a smooth, professional finish for Barbie cakes, it is possible to create a cake without it. You can use alternative materials such as buttercream or marzipan for coating the cake layers. Ensure the coating is smooth and even. For the figure, you can create Barbie’s features using pipe cleaners, colored fondant, or even fabric paint. With creativity and patience, you can still create a stunning Barbie cake without fondant.
Conclusion
Crafting a Barbie cake is an enjoyable and rewarding project that combines creativity, skill, and a bit of patience. By following this step-by-step guide, you’ll be able to create a cake that will impress anyone at any festive occasion. Remember to take your time with each step, pay attention to the details, and most importantly, have fun with the process. With the right tools and techniques, you’ll create a Barbie cake that will be a hit and a memorable centerpiece for your celebration.