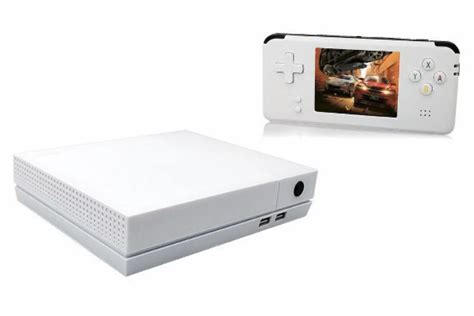
Are you ready to dive into the world of next-gen gaming? If you’re a fan of immersive gaming experiences, then the Soulja Boy Game Console is the ultimate revelation for you. This state-of-the-art console is designed to enhance your gaming experience by providing cutting-edge technology and a plethora of exciting features. This guide is dedicated to helping you unlock the full potential of your new Soulja Boy Game Console, addressing your pain points and equipping you with practical, actionable advice. Let’s jump right in!
The Problem-Solution Opening: Elevate Your Gaming Experience
Many gamers today find themselves overwhelmed by the myriad of options available in the gaming world. From figuring out how to set up your console to mastering advanced settings for an optimal gaming experience, the learning curve can be steep. This guide aims to simplify and streamline your journey into next-gen gaming. We'll provide step-by-step guidance, practical examples, and solutions to common pain points you might encounter. Whether you're a seasoned gamer or just getting started, this guide will help you elevate your gaming experience to new heights.
Quick Reference Guide
Quick Reference
- Immediate action item with clear benefit: Connect to the fastest internet available to reduce lag and improve multiplayer experiences.
- Essential tip with step-by-step guidance: Navigate to the “Settings” menu > “System” > “Updates” to ensure your console is always running the latest software.
- Common mistake to avoid with solution: Don’t use a low-quality power supply; use the one provided with the console to avoid overheating and performance issues.
Detailed How-To: Setting Up Your Soulja Boy Game Console
Setting up your Soulja Boy Game Console might seem daunting at first, but it’s straightforward if you follow these detailed steps.
Step 1: Unboxing and Initial Inspection
Start by carefully unboxing your Soulja Boy Game Console. Check the contents of the box to ensure you have all the necessary components:
- Game Console
- Power Supply
- HDMI Cable
- User Manual
- Warranty Card
If anything is missing or damaged, contact the retailer immediately.
Step 2: Connecting to Your TV
Connect the HDMI cable to both the TV and the console. Use the power supply to connect the console to a wall outlet.
Next, use the HDMI switch or the TV’s input selector to choose the HDMI port where the console is connected. Your TV screen should now display the console’s boot-up screen.
Step 3: Initial Console Setup
Follow the on-screen prompts to set up your console. This includes selecting your preferred language, configuring your network settings, and creating a user profile.
To connect to a Wi-Fi network:
- Navigate to “Settings” > “Network” > “Set Up Internet Connection.”
- Choose your Wi-Fi network from the list of available networks.
- Enter your network password when prompted.
- Test the connection to ensure it’s stable and fast.
Step 4: Updating Your Console
To ensure you’re getting the best performance:
- Navigate to the “Settings” menu.
- Select “System” and then choose “Updates.”
- Choose “Check for Updates” and follow the on-screen instructions.
Download and install any available updates.
Detailed How-To: Customizing Your Settings for Optimal Performance
Customizing your console’s settings can greatly enhance your gaming experience. Here’s how to optimize your console for the best performance:
Step 1: Graphics and Display Settings
To access these settings:
- Go to the “Settings” menu.
- Navigate to “Display & Sound” > “Video Output Settings.”
Here, you can adjust settings like resolution, refresh rate, and color settings to match your TV’s capabilities. For the best performance, choose:
- Resolution: 4K at 60Hz
- Color Depth: 10-bit
- Frame Rate: Auto
Step 2: Sound Settings
For an immersive audio experience:
- Go to the “Settings” menu.
- Navigate to “Display & Sound” > “Audio Output.”
Here, you can adjust settings like output device, audio format, and surround sound. For optimal settings:
- Output Device: Select your connected sound system. Audio Format: Bitstream (if supported)
- Surround Sound: Enable
Step 3: Controller Configuration
To configure your controller:
- Navigate to the “Settings” menu.
- Select “Devices” > “Controllers & Sensors.”
- Choose “Wireless Controller” to configure it.
Here, you can adjust settings like vibration, button mapping, and display brightness. Customize these settings to suit your preferences for the best gaming experience.
Practical FAQ
How do I troubleshoot my console if it’s not turning on?
If your console isn’t turning on, follow these steps:
- Check the power supply to ensure it’s properly connected.
- Make sure the power outlet is working by plugging in another device.
- If using a wireless controller, try a hard reset by holding down the reset button on the controller for 10 seconds.
- If none of these steps work, contact customer support for further assistance.
What should I do if my game is lagging?
If your game is lagging, try these steps to improve performance:
- Check your internet speed; ensure it’s fast and stable.
- Close any background applications to free up system resources.
- Restart your console to clear any temporary glitches.
- Update your console’s firmware to the latest version.
- Ensure your game is installed on an SSD for faster load times.
How can I improve my multiplayer gaming experience?
To enhance your multiplayer experience:
- Ensure your console is connected to the fastest and most stable internet connection.
- Use a wired Ethernet connection for the most reliable and lowest-latency gaming experience.
- Turn off any other devices that might be using bandwidth.
- Regularly check for and install any console and game updates.
- Join online gaming forums to find tips from experienced players.
With this comprehensive guide, you’re well-equipped to get the most out of your Soulja Boy Game Console. Follow these detailed instructions to set up, customize, and troubleshoot your console for an optimal gaming experience. Happy gaming!